Hot or Cold Garlic Spinach

Well, it’s hot. I am not a person who enjoys heat. I mean, you can always warm up, but it seems much more difficult to cool down. I suppose it’s because of where I live, all cool and inviting and rainy…and yes, that lack of sun does come with a corresponding vitamin D deficiency, but! I’m not overheated, and that’s a plus.

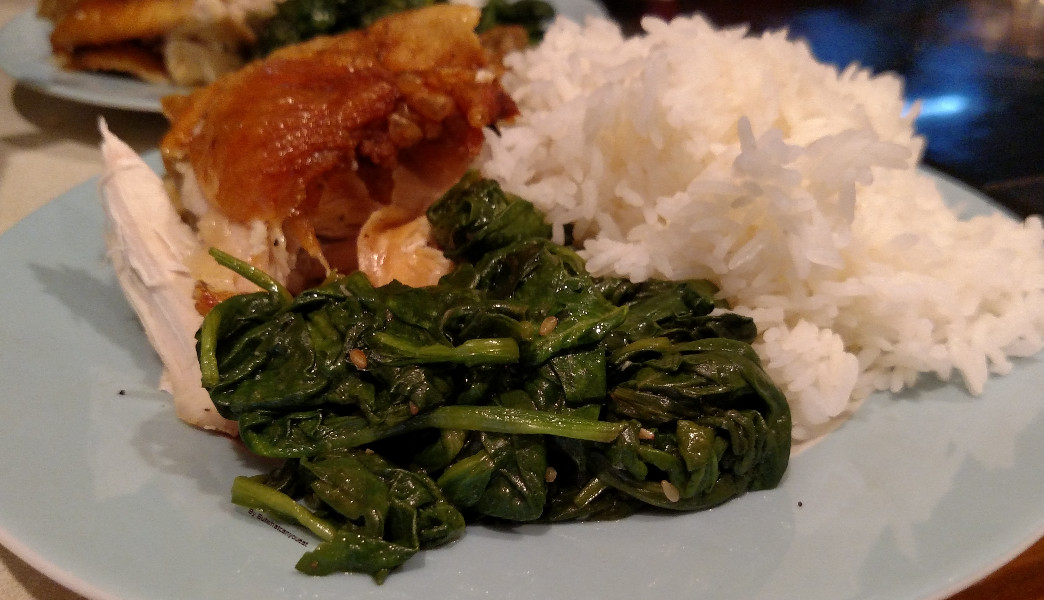
And, honestly, when the temperature rises outside, do any of us want to make the temperature go up inside? It just seems like a horrible idea that leads to sweat and hardship and dishes. (Okay, everything leads to dishes, but everything is harder when it’s hot!) That’s why I like hot weather recipes that don’t take a lot of time, that absolutely don’t involve the oven, and that I can eat hot or cold. Enter….Hot or Cold Garlic Spinach!

It’s easy, it’s delicious, and it doesn’t take a lot of a) time or b) ingredients. It’s perfect for summer or the unlooked-for heat snap!

You’ll need (serves 2 – 4):

4 cups spinach

4 tsps. olive oil

2 tsps. rice vinegar

1 tsp. mirin (optional)

2 garlic cloves, diced

1 tsp. sesame seeds

1/4 tsp. sesame oil (optional)

Salt

White Pepper

Get out a frying pan with high sides and heat the olive oil on medium-low. Thoroughly wash and shake out your spinach, and then dice the garlic. Add the spinach, garlic, salt and pepper to the pan, and stir to coat the vegetables in oil as they begin to wilt (about 5 – 10 minutes, depending on heat.) When you can smell the garlic and the spinach has turned malleable, add the rice vinegar and the mirin to the pan. Keep stirring until the steam goes away, and then drain any excess water. If you want to eat it hot, then serve immediately and top with the tiniest amount of sesame oil and the sesame seeds. If you want to eat it cold, toss on the sesame oil and seeds, and then stick it in the refrigerator to cool down and have as a salad!

Additional comments:

If you don’t want to cook the spinach in the pan, you can blanch it first in a pot of boiling water for 2 minutes. You’ll have to cook the garlic in the olive oil in the fry pan separately, then add the spinach, salt, and pepper. Then sauce as directed above!

Zucchini and Tomato Side Dish

Okay, there’s some onion in there too, but I like alliums, sue me! One of the best things about summer is the vegetables, and one of the hardest things about eating vegetables when you’re allergic to certain foods is picking safe ones to eat. I can’t answer that for anyone but myself, really, I’m not a doctor of any sort, but I do know that right now we all have to be as mindful and careful with ourselves as possible.

So look on this meal as a starting point. The vegetables I can eat are inside it: zucchini, tomatoes, garlic, and onions all from sources I can trust. If you have a garden, I suggest getting out your favorite squash and onions, slap on a tomato or two, and get to chopping. If you don’t have safe access to fresh foods, then frozen works just as well. The key here, as with all allergic cooking, is to do your research. Stick with brands you haven’t had a reaction to before, or email their information departments. I have had good luck with organic in my area (though corn-based farming aids can be just as rife in that area!) and this is always a good time to inquire about local CSAs, or places like that.

In any case, this is a quick, light dish meant for a satisfying side to chicken or pork, or as a mixer in your favorite pasta. It feels very summery to me, actually, hot and peppery, but also light and not overwhelming. I like this sometimes just on garlic toast!

You’ll Need (Serves 2 -4):

2 medium zucchini, chopped

1/2 onion, chopped

1 – 2 tomatoes, chopped, or a handful of grape tomatoes

1 garlic clove, sliced

1 heavy pinch of thyme

Salt and black pepper

Olive oil

Heat the oven to 350F, and line a baking dish with aluminum foil. Wash and chopped all your ingredients and add them to the baking dish. Give it a stir to make sure the oil is evenly distributed, and that you add just a little more salt than you think you’ll need. These vegetables are watery, so they’ll make their own sauce, but it’s water…it needs a kick! Cook for about 20-30 minutes, or the tomatoes pop, and then serve.

Oh! And if you want a bit more flavor, add some red pepper flakes as well.

Hasselback Potatoes: When You Want Fries, but Cutting Them Up Seems Hard

Sometimes I want fried potatoes, but a) can’t because deep frying terrifies me, and b) my lord, does it seem like a lot of work. When in doubt, and when I want to look fancy, but also feel a bit accomplished, I make “Hasselback Potatoes” which are a sort of crossover potato dish. They’re fancier than just plain ol’ baked potatoes, and the slices mean I can stuff just…so much more fake butter and salt than I should. And you can put anything you want on it! Make it vegan and plant-based! Make it paleo or vegetarian with all the cheese in the world. Add bacon and get your carnivore on! It’s your potato! So come with me, theoretical reader, as I show you have to make the one potato dish you’ll ever need for when company calls, or you want to treat yourself to a date for one.

Let me just get out here that I have no idea where this dish came from. Wikipedia has an unsourced accreditation to a Swedish chef (insert muppet here) in 1959, but I only remember hearing about it a couple of years ago…possibly on the Food Network. Regardless of however it came into my life, it is a potato dish, and thus, I will never let it go. I confess I hate the texture of baked potatoes, and love the brazen salt glut of a good pile of fries, and Hasselback potatoes hit me in the happy medium. Also, I made ketchup again, and I needed something to drench in it. (Pity me, it’s a disease!)

For people like me, with a corn allergy, root vegetables like potatoes can be dangerous. They soak up a lot of what’s in the ground, and so if the farmer grows them in the field with corn-based fertilizers or sprays them with corn-based chemicals for shipment, you can run into real trouble. When I buy potatoes in the grocery store, I buy loose potatoes–not bagged–and I try to aim for the dirtiest ones I can find.

I know it sounds weird, but it’s true! The more dirt is on a vegetable, the less likely you are to run into some kind of chemical you might be allergic to, like the sprout inhibitor some potatoes are sprayed with. Always be careful!

You’ll Need (Serves 1):

1 medium sized potato (I like russets or yukon golds)

1/4 cup olive oil

Salt and Pepper to taste

Preheat the oven to 375F, and line a casserole pan with aluminum foil. Then wash and peel your potato, removing any dark spots or hardened eyes you uncover.

To make Hasselback potatoes, take a sharp, heavy knife, and carefully cut slices width-wise down the length of your potato. You want to make each slice approximately as big as teh other for each cooking, and you want to take the knife down almost but not quite cutting through the potato. Be very careful with your knife! I speak as one who has sawed through their thumbnail and lived to regret it.

Decrease the oven to 350F. Put the potato in the casserole dish and cover in oil, salt, and pepper. Cook until a fork can be pushed into the side of the potato easily and come out cleanly (about 45 minutes to an hour). Then add whatever toppings you want! I like salt, pepper, a lot of Miyoko’s fake butter, and a dollop of Forager’s unsweetened plain yogurt.

Roasted Sweet Potato Bites

I love sweet potatoes, let’s just begin there. They’re sweet without being cloying, they’re delicious, and you can make them with a minimum of fuss which I deeply appreciate in a root vegetable. You scrub ‘em up, oil ‘em down, stab them a few times, then stick them in the oven until they pop out steamy and fluffy and delicious. Sweet potatoes: They’re great!

But sometimes I want to be fancy, like on Thanksgiving, and when I want to push the boat out a little I go to this recipe for diced, roasted sweet potatoes. They take a little work, but they come out sweet and tangy, and so entirely worth it.

Just remember, if you don’t have a food processor, it’s perfectly fine to cut the sweet potatoes into larger chucks. I find the safest method for me is to turn the potato over by a half or a quarter turn (depending on size) each time I make a cut while holding my knife firmly at an angle.

You’ll Need (serves 2 – 4):

2 – 4 sweet potatoes, cleaned, skinned and diced

1 – 2 tsp. ground ginger

1 – 2 tsp garlic

2 – 3 tsp. sugar

2 tsps. Rice vinegar

1/2 – 1/3 cup of oil

Salt and Pepper to taste

Preheat your oven to 375F

Clean your sweet potatoes with cold water, and then skin and dice them. Use either a food processor or a good sharp knife. Take a large bowl and put the ginger, garlic, sugar, rice vinegar, and oil, salt, and pepper into a large bowl.  Toss the sweet potatoes in the mixture and then pour it out onto either a large baking dish or a roasting sheet lined with aluminum foil.

Put the sweet potatoes in the oven, and decrease the temperature to 350F. Keep an eye on them in case the sugar starts to burn. They should cook, depending on size and amount, from forty minutes to an hour, but make sure to try and turn the potatoes at least once. Once they’re cooked through (you should be able to stick a fork easily in the largest piece) take them out, and spoon them into your serving dish.