Roasted Turkey Breast with Assorted Vegetables

I know, I know! Leftovers from a US Holiday are part and parcel of American food culture, they’re how we extend the warmth of the holiday into the homes of our family and friends. They’re an indication of friendship and love, because it’s our way of showing care.

When the leftovers are simply for ourselves in a small family, however, I feel that the best way to avoid wasting food is to limit the amount of leftovers to a manageable level. After all, with my allergies, I tend to eat the same foods again and again, which can become too monotonous. (When I’m eating with all my family, though? All bets are off!  Hope you like that gallon of stuffing coming your way!) This turkey breast recipe is something I make when it’s not Thanksgiving but I believe it’s perfectly adaptable to any holiday celebration!

Also, a word about turkeys and brine. I don’t brine things, because I don’t trust store bought mixes. So this is an unbrined kosher turkey breast which came out to about two pounds.

You’ll Need (serves 2 – 4):

1 turkey breast, around two pounds by weight

2 tsps. Thyme

2 tsps. Sage

3-4 cloves roasted garlic, smushed or chopped

2 tsps. Parsley

2 tsps. Paprika

2 – 4 Carrots, chopped into thirds

2 – 4 Celery stalks, chopped into thirds

1 Onion, chopped into chunks

¼ cup Sunflower Oil

Salt and Pepper to taste

If frozen, thaw your turkey breast in the refrigerator, and keep it in there until it’s ready to be put into the oven. The Butterball company is a <a href=”http://great resource for timings and methods!

Preheat your oven to 375F.  Chop up your vegetables, and get out a roasting pan big enough to hold all your ingredients without creating too much space. Cover the pan with aluminum foil for easy cleaning, or leave it open, and use the drippings for gravy later! (NB: I am horrible at gravy. So bad it’s a family joke. Mom handles any and all required gravies in the family, because when I make it, she usually winds up salvaging them anyway)

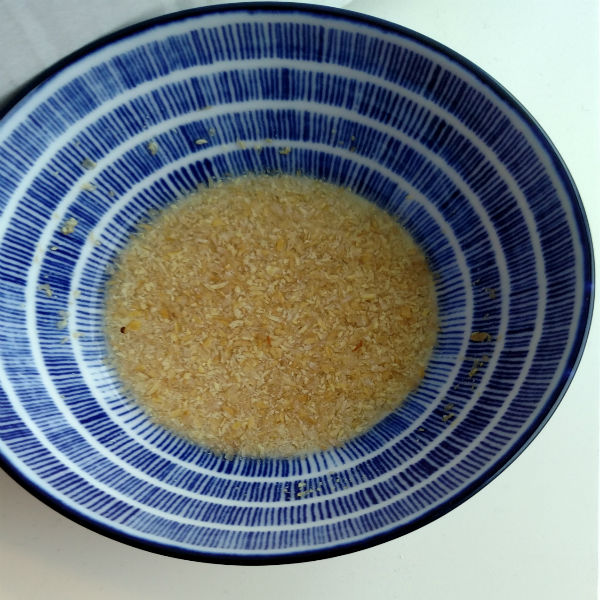
Put the vegetables and a splash of the sunflower oil first. Then, get out a small bowl and combine all the herbs, spices, garlic, and leftover oil into a gooshy mess. Carefully open up space beneath the skin of your turkey breast, but slowly inserting your hand between the skin and the meat. Then, using that same hand, pour in and smooth out the garlic herb mix you made underneath the skin of the turkey breast. This will help your turkey stay moist, and help keep the skin from burning. Once all the mix has been added, put the turkey breast in amidst the vegetables, and add any leftover oil to the top of the turkey breast (doesn’t have to be much!)

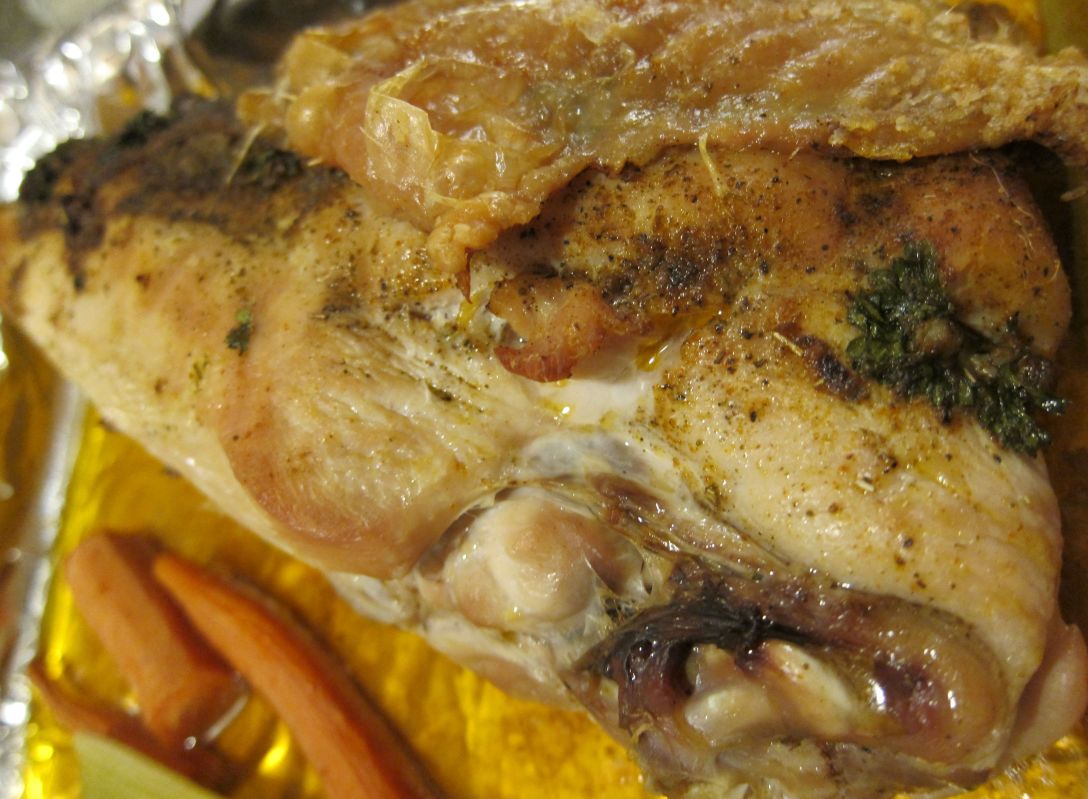
Put the turkey in the oven and decrease the heat to 350F. At two pounds, it should cook for about an hour and a half. Once out, let the meat rest for at least ten minutes before cutting it up and serving.

Hot tip: Does the turkey’s skin look a little strange? For crispier, cleaner skin, rub the turkey breast with kosher salt, and then wash it clean in cold water. Make sure to pat it dry before cooking.

Oh My Maida! Gluten-Free Vegan Cowboy Cookies

vegan, plant-based gluten free chocolate chip cookies

I think in almost every child’s life there exists The Cookie. The One Cookie to Rule Them All.

Maybe it wasn’t baked by their parents or caregivers (I have very fond memories of eating Oreos at my grandparents. Oreos! The LUXURY!). Maybe, looking back, it was something so simple and pleasant that you forget it entirely until the sudden need for a cookie consumes you, and nothing less than the closest approximation to said Cookie will do.

So it is, dear readers, in my home, where Maida Heatter’s Book of Great Chocolate Desserts reigns supreme.  Other authors may entice, but La Heatter remains steadfast, consulted for every serious dessert undertaking and never far from reach on the cookbook shelf. And the cookie recipe most used in our house?  Cowboy Cookies on page 178. Falls right open to the page without any need to consult the index.

They’re gorgeous oatmeal chocolate chip cookies with optional walnuts or pecans and my mother makes the best ones. I’m not prevaricating, she’s the best baker in the family and it’s by a very wide margin.  If we ate cookies (not often, butter was expensive!) these were the ones we ate. Of course, now I’m actually allergic to a ton of the ingredients but that’s not the memory I prefer to hold on to! 

What I like to do, at least cookie-wise, is fix what’s not working for me, and away with all the rest! So when I was suddenly seized late at night with an urge to sink my teeth into something chocolatey and delicious, I followed ancient tradition and pulled out the good ol’ Heatter, page 178.

Baking powder, vanilla extract, and butter, oh my!  Not things I can have, but fortunately I could omit the first two and substitute the third. The flour I abandoned, because Mom is trying to cut down on gluten for health reasons, and I sure can’t eat thirty-six cookies all by myself.  Since oats make me itch, I decided to up the flour in order to get the right consistency.

I am a huge novice when it comes to gluten-free baking, so I’m always trying to figure out how to bake things correctly. From the little bit of America’s Test Kitchen’s website available to read without paying for a subscription, they stress that letting gluten-free food rest and re-hydrate will make your food bake better. (Baker’s note: Mom informs me that resting cookie dough is actually pretty common. Guess who’d go farther on GBBO?) Always let your gluten-free bakes rest at least 30 minutes, including cookies and other things that don’t normally need to rest.

Mine assuredly did, because at that point, I realized that it was 9:30 at night and I needed to go to bed.

So, I slung the bowl into the fridge (covered with plastic wrap) and let it alone until the next morning. It was perfectly fine! Nothing separated or anything.

Heatter’s recipe uses regular AP Flour, so I tried a mix of different flours on my own. Sweet white sorghum to make up for the oats, coconut and almond flours for sweetness, millet for protein, and arrowroot for cohesion. It also only has instructions re: baking times for regular AP flour, so I experimented with the cooking time in the oven. I have learned to my cost (and the suspicion of my smoke alarm) that GF food just takes longer to cook, so I tried low and slow and high and fast, and you know what? Perfectly cooked at 350F.  Just leave them in for 40 minutes and try not to stare through the oven door like you’re in the Bake-Off. I also let them cool on the cookie sheet for ten minutes before transferring them to the cooling rack.

For everything else, I followed the recipe instructions to the letter, baking them on the top rack because there’s only one cookie sheet, and remembering to set my timer because I’m a flake. So, if you feel like a chewy chocolate chip cookie with slightly crisp edges and nicely pliant density, then follow the recipe below!

Gluten-Free Vegan Cowboy Cookies (adapted from Maida Heatter)

Makes 36 cookies

1/2 cup super-fine almond flour

1/2 + 1/3 cup coconut flour

1/3 cup millet flour

1/3 cup arrowroot flour

1/3 cup sweet white sorghum flour

1 Tbsp. tapioca flour

1 Flax Egg

1/2 tsp Baking Soda

1/4 tsp salt

1/2 cup white sugar

1/2 cup brown sugar (I don’t eat brown sugar, and instead sub in more white sugar)

1 stick (1/4 lb.) Miyoko’s butter, or 6 Tbsp. oil

1/2 cup chocolate chips

~1/2 cup broken walnuts or pecans (optional)

~1 cup water or cashew milk

It’s always good to cream the butter and sugar together, but if the butter’s too hard, stick it in the microwave for thirty seconds and then stir in the sugars in a separate bowl. Add all the flours, sugars, and butter into the flax seed bowl and stir them together before you add the chocolate and nuts. Slowly add the water into the bowl as you mix until it looks like cookie dough. You might not need the whole cup of water; it should be thick and scoopable, not like a pancake batter.

Cover the bowl and stick it in the fridge for at least thirty minutes. When you’re ready to bake, preheat the oven to 375F. 

I use a small ice cream scoop to put the cookies on the tray, and then just press them flat with my fingers. You should be able to fit at least nine on the cookie sheet, they don’t really spread much.

Once the cookies are in the oven, decrease the heat to 350F, and bake them for 40 minutes. Once baked, cool on the cookie sheet for 10 minutes, and then transfer to the cooling rack. Scoop and repeat!

My content will always be free, but if you like my recipes and have something to spare, please consider sending me a tip! 

Building Block: The Flax Egg

One of the more difficult parts of baking and cooking when you’re allergic to a staple is finding a reasonable way to salvage the binding capabilities of the egg into something less likely to make your throat close. Fortunately, there’s flax. The flax egg is a workhorse in the world of food substitutions: It does its job and it does it well.

Flax is also known as Linseed, and it’s an herbaceous plant used for food and for clothing. I used to see it dousing cut up banana pieces at the supermarket in a misguided attempt to get two sales for the cost of one free sample, but I never indulged. The very things that make flax a good healthy food ingredient are the same things that make it incredibly unappetizing to look at. To whit, it’s brown, it’s gummy, and it sticks to things.

Ground flax really shines in baking, where I can whip together a flax ‘egg’ and set it aside to gel while I put together the rest of my ingredients. It works for pancakes, cookies, casseroles and sauces, though there are alternatives such as tapioca or arrowroot powder if you don’t want the little brown flecks it leaves in the food. I store my ground flax in the freezer (it keeps longer) after opening, and dole it out as needed!

Making a vegan, gluten-free, plant-based egg to cook with turns out to be incredibly simple! It’s a 1:1 substitution for traditional eggs, and I’ve never had any trouble baking with them. (I don’t recommend it for things like Pavlovas, or as a substitute in mousse however. There simply isn’t enough air in a flax egg for those types of dishes)

You’ll need (1 egg):

1 Tbsp. ground flax

3 Tbsp. cold water

Put the flax and the water into a small bowl, give it a little stir, and then set it aside to congeal into a gel for about 10-15 minutes. After that, you can add it to cookies, cakes, and pie crusts with no problems at all! Once you have this basic substitution in your wheelhouse, you’ll be cranking out the baked goods in no time.

My content will always be free, but if you like my recipes and have something to spare, please consider sending me a tip!