Hasselback Potatoes: When You Want Fries, but Cutting Them Up Seems Hard

Sometimes I want fried potatoes, but a) can’t because deep frying terrifies me, and b) my lord, does it seem like a lot of work. When in doubt, and when I want to look fancy, but also feel a bit accomplished, I make “Hasselback Potatoes” which are a sort of crossover potato dish. They’re fancier than just plain ol’ baked potatoes, and the slices mean I can stuff just…so much more fake butter and salt than I should. And you can put anything you want on it! Make it vegan and plant-based! Make it paleo or vegetarian with all the cheese in the world. Add bacon and get your carnivore on! It’s your potato! So come with me, theoretical reader, as I show you have to make the one potato dish you’ll ever need for when company calls, or you want to treat yourself to a date for one.

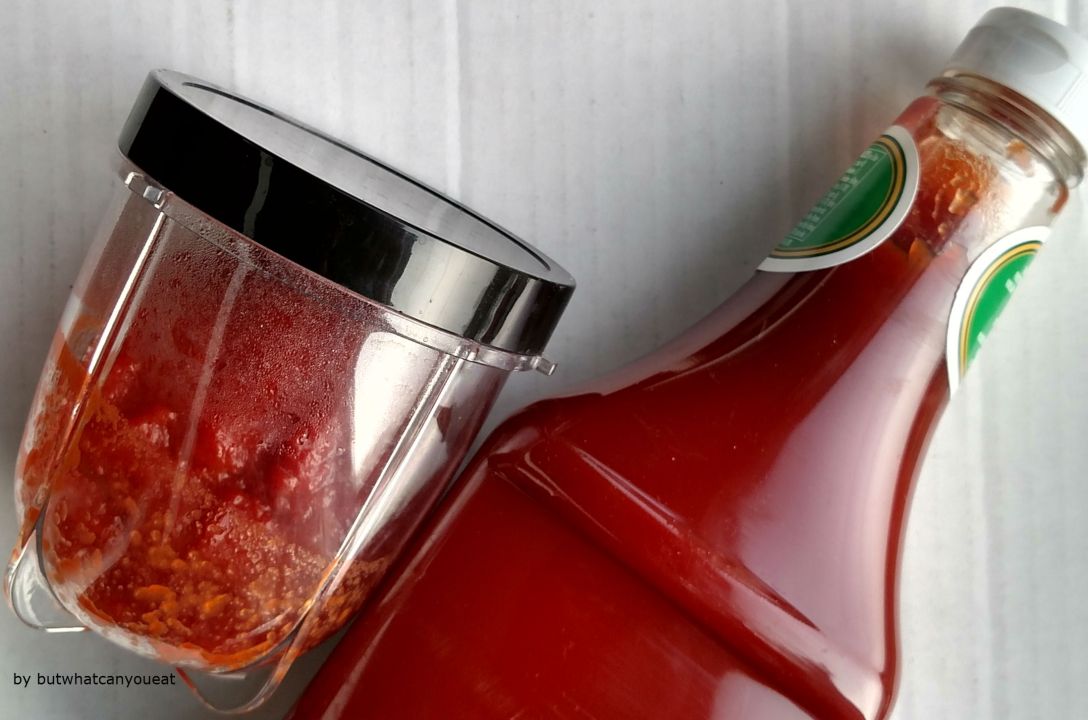
Let me just get out here that I have no idea where this dish came from. Wikipedia has an unsourced accreditation to a Swedish chef (insert muppet here) in 1959, but I only remember hearing about it a couple of years ago…possibly on the Food Network. Regardless of however it came into my life, it is a potato dish, and thus, I will never let it go. I confess I hate the texture of baked potatoes, and love the brazen salt glut of a good pile of fries, and Hasselback potatoes hit me in the happy medium. Also, I made ketchup again, and I needed something to drench in it. (Pity me, it’s a disease!)

For people like me, with a corn allergy, root vegetables like potatoes can be dangerous. They soak up a lot of what’s in the ground, and so if the farmer grows them in the field with corn-based fertilizers or sprays them with corn-based chemicals for shipment, you can run into real trouble. When I buy potatoes in the grocery store, I buy loose potatoes–not bagged–and I try to aim for the dirtiest ones I can find.

I know it sounds weird, but it’s true! The more dirt is on a vegetable, the less likely you are to run into some kind of chemical you might be allergic to, like the sprout inhibitor some potatoes are sprayed with. Always be careful!

You’ll Need (Serves 1):

1 medium sized potato (I like russets or yukon golds)

1/4 cup olive oil

Salt and Pepper to taste

Preheat the oven to 375F, and line a casserole pan with aluminum foil. Then wash and peel your potato, removing any dark spots or hardened eyes you uncover.

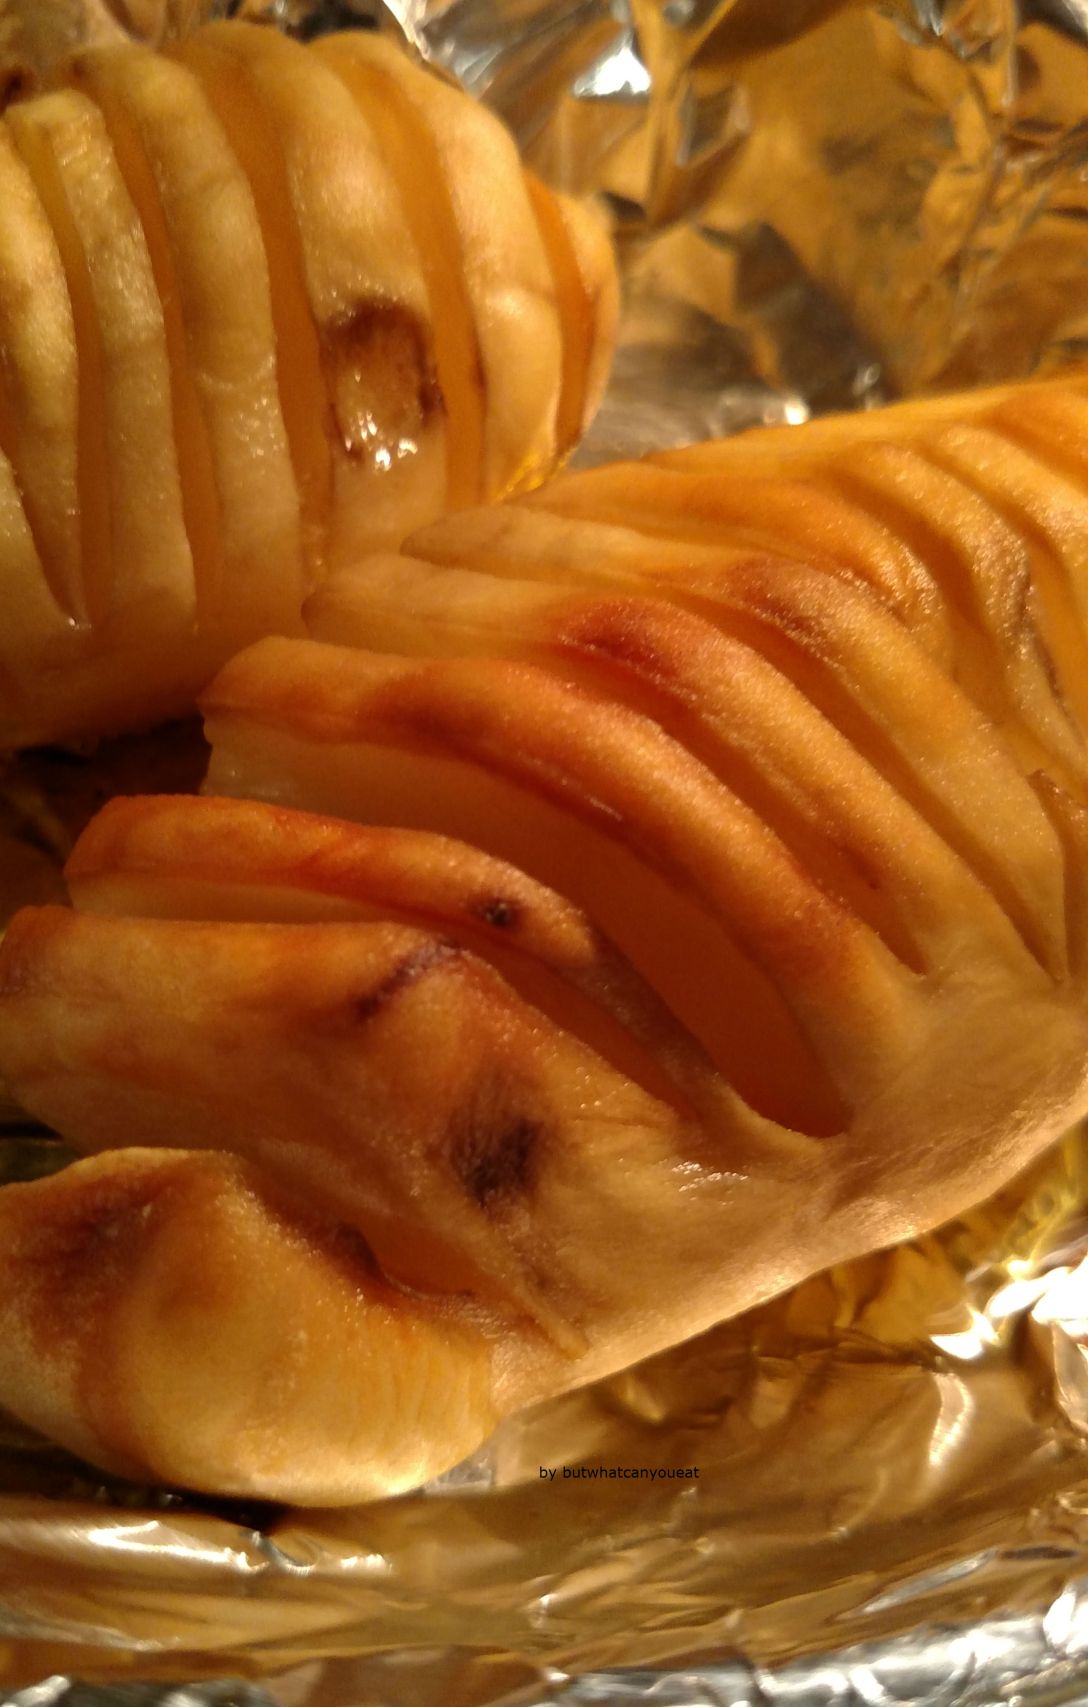
To make Hasselback potatoes, take a sharp, heavy knife, and carefully cut slices width-wise down the length of your potato. You want to make each slice approximately as big as teh other for each cooking, and you want to take the knife down almost but not quite cutting through the potato. Be very careful with your knife! I speak as one who has sawed through their thumbnail and lived to regret it.

Decrease the oven to 350F. Put the potato in the casserole dish and cover in oil, salt, and pepper. Cook until a fork can be pushed into the side of the potato easily and come out cleanly (about 45 minutes to an hour). Then add whatever toppings you want! I like salt, pepper, a lot of Miyoko’s fake butter, and a dollop of Forager’s unsweetened plain yogurt.

Building Block: Homemade Tomato Ketchup

If you have an allergy, shopping at the supermarket can be a little more fraught with pitfalls than your average consumer, and you can’t always escape that desperate scroll through a laundry list of ingredients by going to a farmer’s market or signing on for a CSA. A lot can depend on how a food item is stored or processed, what it’s been sprayed with, and even what field the food is near (I’m looking at you, raw honey!). In short, finding food that’s safe for you and your family when there’s a food allergy in play can be a lot of ‘trial’ as well as the horrible frustration of a whole lot of ‘error.’

How this works out for me, is that there are many store-made foods I just can’t have, even when the ingredients list works in my favor. Soup stock, alternative milks, and many condiments are on this list, and even though I’m still trying to find some of these items, there is simply no guarantee that I’ll succeed.

Thus, I have brought to you today….a recipe for ketchup! No, I know! Actual ketchup! It’s a thing you can make!  I was also surprised. There are just some foods that you don’t think about cooking up until fate or craving sort of forces you into scouring your bookshelf for incredibly old recipes.

Many of those recipes resembled something more like the Brown Sauce you find in the UK, or like a thickened version of Worcestershire Sauce which wasn’t what I wanted at all. In my head, ketchup is a tomato-based delight, slightly sweet, but with an underlying tart saltiness and a smooth thickened texture. I wanted a sauce I could drag a fry through and have it come out clinging to the potato rather than drip off the side, if you know what I mean.

Finally, I settled on an approximation of all the recipes I had seen, only drastically reduced because if I failed at this recipe, I didn’t want to be saddled with cup after cup of some nasty tasting marinara. So I made some substitutions, did some highly suspect math, and complained endlessly to my friends via text that I was going to burn my ketchup like some city slicker who just arrived on the prairie. I could sense the ghosts of my ancestors rising up to judge me (my grandmother, in particular, just wanted me to keep trying with store-bought.)

Short story, I did not burn anything! (I did take about a ½ inch of skin off my ring finger, but that’s an unrelated incident). And the result was…ketchup! Actual, real-tasting, tried and true tomato ketchup! I felt so accomplished, I can’t even tell you.

But it also impressed upon me how much time and investment making ketchup is. A little over two pounds of tomatoes produced ½ cup of actual ketchup. All the recipes I found called for immense amounts of ingredients, at a cost today which most people (including me) might honestly find prohibitive, not just in money, but in time spent cooking. That’s the trade off with a lot of allergy-friendly products: what others can just pluck off the shelf, we have to devote time and thought and money to achieving.

So this is my admittedly delicious, but scaled down recipe for tomato ketchup. It’s easily adjusted to create more, but I honestly recommend creating a small batch of the stuff—as I did—to make sure you like the flavor and want to devote the time to making the product. I think making this recipe greatly increased my confidence in the kitchen (I made a condiment! Me!). It feels really good to know that I can still have something, even if all the store-bought varieties so far make me itch.

You’ll Need (serves 1):

~2 lbs. tomatoes

water, for boiling

¼ cup apple cider vinegar

1 large clove garlic

1 tsp. white sugar

¾ tsp. salt

1/8 tsp. nutmeg

¼ tsp. onion powder

1/8 tsp. paprika

Wash your tomatoes and add them to a large pot with a lid. Pour in enough water to cover the tomatoes, and then bring them to boil on the stove top. Once the tomatoes have split, remove from the stove and drain the water.

Using a fine mesh strainer and a spoon, or a berry press, press the juice and pulp out of the tomatoes back into the pot you just used. Make sure to scrape the bottom of the strainer to get all the good stuff!  Add in all the rest of the ingredients, and then reduce the sauce on low to medium-low for three hours, or until the sauce resembles ketchup. It should be thick enough to part with a spoon and it should definitely stick to the back of said utensil. Stir frequently to make sure that the sugars don’t burn. Allow it to cool completely before putting it into the refrigerator.

Additional Comment:

Around 2 lbs. of tomatoes yielded ½ cup of ketchup.

If you’re scaling up this recipe, please remember that this is a heavily reduced condiment so all the flavors will be quite concentrated. Less is definitely more!  Also, if you’re worried about the amount of nutmeg, try substituting with mace instead.

Roasted Sweet Potato Bites

I love sweet potatoes, let’s just begin there. They’re sweet without being cloying, they’re delicious, and you can make them with a minimum of fuss which I deeply appreciate in a root vegetable. You scrub ‘em up, oil ‘em down, stab them a few times, then stick them in the oven until they pop out steamy and fluffy and delicious. Sweet potatoes: They’re great!

But sometimes I want to be fancy, like on Thanksgiving, and when I want to push the boat out a little I go to this recipe for diced, roasted sweet potatoes. They take a little work, but they come out sweet and tangy, and so entirely worth it.

Just remember, if you don’t have a food processor, it’s perfectly fine to cut the sweet potatoes into larger chucks. I find the safest method for me is to turn the potato over by a half or a quarter turn (depending on size) each time I make a cut while holding my knife firmly at an angle.

You’ll Need (serves 2 – 4):

2 – 4 sweet potatoes, cleaned, skinned and diced

1 – 2 tsp. ground ginger

1 – 2 tsp garlic

2 – 3 tsp. sugar

2 tsps. Rice vinegar

1/2 – 1/3 cup of oil

Salt and Pepper to taste

Preheat your oven to 375F

Clean your sweet potatoes with cold water, and then skin and dice them. Use either a food processor or a good sharp knife. Take a large bowl and put the ginger, garlic, sugar, rice vinegar, and oil, salt, and pepper into a large bowl.  Toss the sweet potatoes in the mixture and then pour it out onto either a large baking dish or a roasting sheet lined with aluminum foil.

Put the sweet potatoes in the oven, and decrease the temperature to 350F. Keep an eye on them in case the sugar starts to burn. They should cook, depending on size and amount, from forty minutes to an hour, but make sure to try and turn the potatoes at least once. Once they’re cooked through (you should be able to stick a fork easily in the largest piece) take them out, and spoon them into your serving dish.

Rice Stuffing For the Rest of Us: Gluten-free and Allergy-Friendly

In my family, the side dish you’re always going to see is rice. I can eat it, my mother can eat it, my little brother can eat more of it, but he is only smaller than me in years so that makes sense (seriously, it’s so difficult to be so much older and yet so much shorter!) Even when I could eat practically nothing without reacting to it, I could eat jasmine rice.

But on Thanksgiving—at least in my family—there was never a grain of rice to be seen. It just wasn’t a part of my grandmother’s traditional menu, and changing that line up required an Act of Congress and a two-thirds majority of Aunts. When I was younger, it wasn’t so much of a problem, but now that my food allergies outlaw so many commercial brands and ingredients, putting together a meal that both tastes good and reminds me of my childhood Thanksgivings takes a little bit more ingenuity. Enter Rice Stuffing!

I knew two things I wanted when I set about putting this recipe together: I wanted it to taste like regular stuffing and I wanted the whole dish not to take forever and a day to cook. I think I’ve succeeded on both fronts with this recipe, which creates mound after mound of flavorful rice stuffing dotted with vegetables and herbs. It’s easily adaptable to whatever stuffing recipe you hold dear to your heart as well, and it’s absolutely no muss, no fuss.

You’ll Need (makes 6 servings):

2 cups cooked white jasmine rice

2 carrots, diced small

2 celery stalks, diced small

1 medium-sized onion, diced small

2 – 3 Tbsps. Olive oil

2 cloves roasted garlic, either smushed or chopped

2 tsps. salt

2 tsps. black pepper

1 tsp. red pepper flakes

2 tsps. thyme

2 tsps. sage

1 tsp. rosemary

2 tsps. parsley

1/2 – 2/3 cup broth (use mushroom broth to make it vegan!)

Optional:

1 cup crumbled sausage meat for a heartier dish (cooked with the vegetables)

1 cup button mushrooms, chopped (cooked with the vegetables)

Make the rice ahead of time. When you put the rice into the mix, it should be room temperature, but not cold. You’re also going to need a metal spatula to scrape the bottom of your pan.

Put your oil into a deep frying pan and heat the pan to medium. Dice up your vegetables and add them to the pan, making sure to also add in all the herbs and spices, except for your garlic.  Let that cook down, stirring occasionally, the vegetables soften and the onions become translucent. Add in your garlic and stir until you can smell it.

Push all your vegetables to the sides of the pan, and make a well. Add in your cooked rice, and break up any clumps with your spatula. You want the rice to warm through, so carefully stir it in with the vegetables. When the rice mixture begins to stick to the bottom of the frying pan, creating a sort of brown skin, slowly begin pouring in your broth. You want to add enough liquid that the rice plumps up a bit and comes away from the bottom of the pan, but not enough to drown the rice and make it a solid mushy mess.  Keep turning the stuffing in the pan until every grain of rice shines with the ‘sauce’ you’ve created and the food has begun to stick again. Then, transfer to a serving dish, and it’s ready to go!

Building Block: The Flax Egg

One of the more difficult parts of baking and cooking when you’re allergic to a staple is finding a reasonable way to salvage the binding capabilities of the egg into something less likely to make your throat close. Fortunately, there’s flax. The flax egg is a workhorse in the world of food substitutions: It does its job and it does it well.

Flax is also known as Linseed, and it’s an herbaceous plant used for food and for clothing. I used to see it dousing cut up banana pieces at the supermarket in a misguided attempt to get two sales for the cost of one free sample, but I never indulged. The very things that make flax a good healthy food ingredient are the same things that make it incredibly unappetizing to look at. To whit, it’s brown, it’s gummy, and it sticks to things.

Ground flax really shines in baking, where I can whip together a flax ‘egg’ and set it aside to gel while I put together the rest of my ingredients. It works for pancakes, cookies, casseroles and sauces, though there are alternatives such as tapioca or arrowroot powder if you don’t want the little brown flecks it leaves in the food. I store my ground flax in the freezer (it keeps longer) after opening, and dole it out as needed!

Making a vegan, gluten-free, plant-based egg to cook with turns out to be incredibly simple! It’s a 1:1 substitution for traditional eggs, and I’ve never had any trouble baking with them. (I don’t recommend it for things like Pavlovas, or as a substitute in mousse however. There simply isn’t enough air in a flax egg for those types of dishes)

You’ll need (1 egg):

1 Tbsp. ground flax

3 Tbsp. cold water

Put the flax and the water into a small bowl, give it a little stir, and then set it aside to congeal into a gel for about 10-15 minutes. After that, you can add it to cookies, cakes, and pie crusts with no problems at all! Once you have this basic substitution in your wheelhouse, you’ll be cranking out the baked goods in no time.

My content will always be free, but if you like my recipes and have something to spare, please consider sending me a tip!